Ultimate Glass Pack Documentation
Hi! Thanks for purchasing the Ultimate Glass Pack for Blender. It is a straightforward asset and this page will show you how to use the product in your own projects to get unique and stunning glass based on real world samples.
There are 2 ways to use UGP (Ultimate Glass Pack). The recommended way is to use Blender’s APPEND operation to import the collections into your existing project. The second way however is using Blender’s asset browser. This method is not recommended unless you just want the materials of the glass in your asset library as Blender’s asset library does not maintain object relations within collection assets (such as parents, constraints and most importantly, drivers). UGP supports the asset browser as a way to organize your assets and reuse the included materials in your own project however if you want the auto scaling wires and auto scaling textures then you should use the Append method.
Asset Browser Setup
First lets go over using UGP with the asset browser as this method is easier but does not work fully as intended. The first step is to add the path to the included .blend file in your Blender preferences under ‘File Paths’
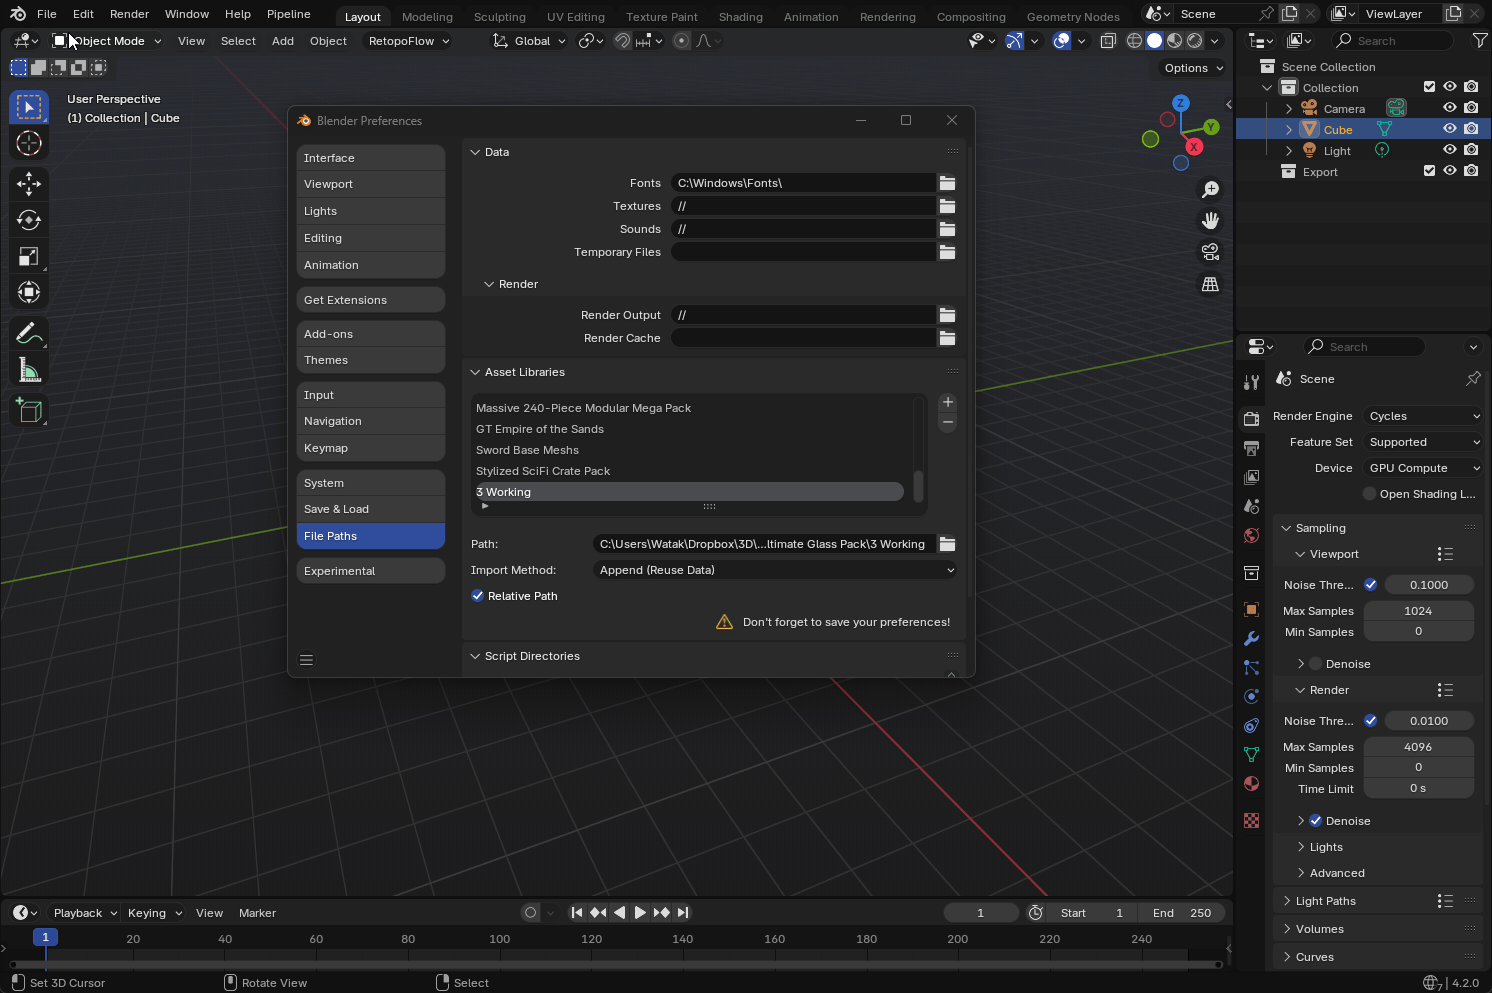
After doing this step you should see Ultimate Glass Pack in your Blender Asset Browser
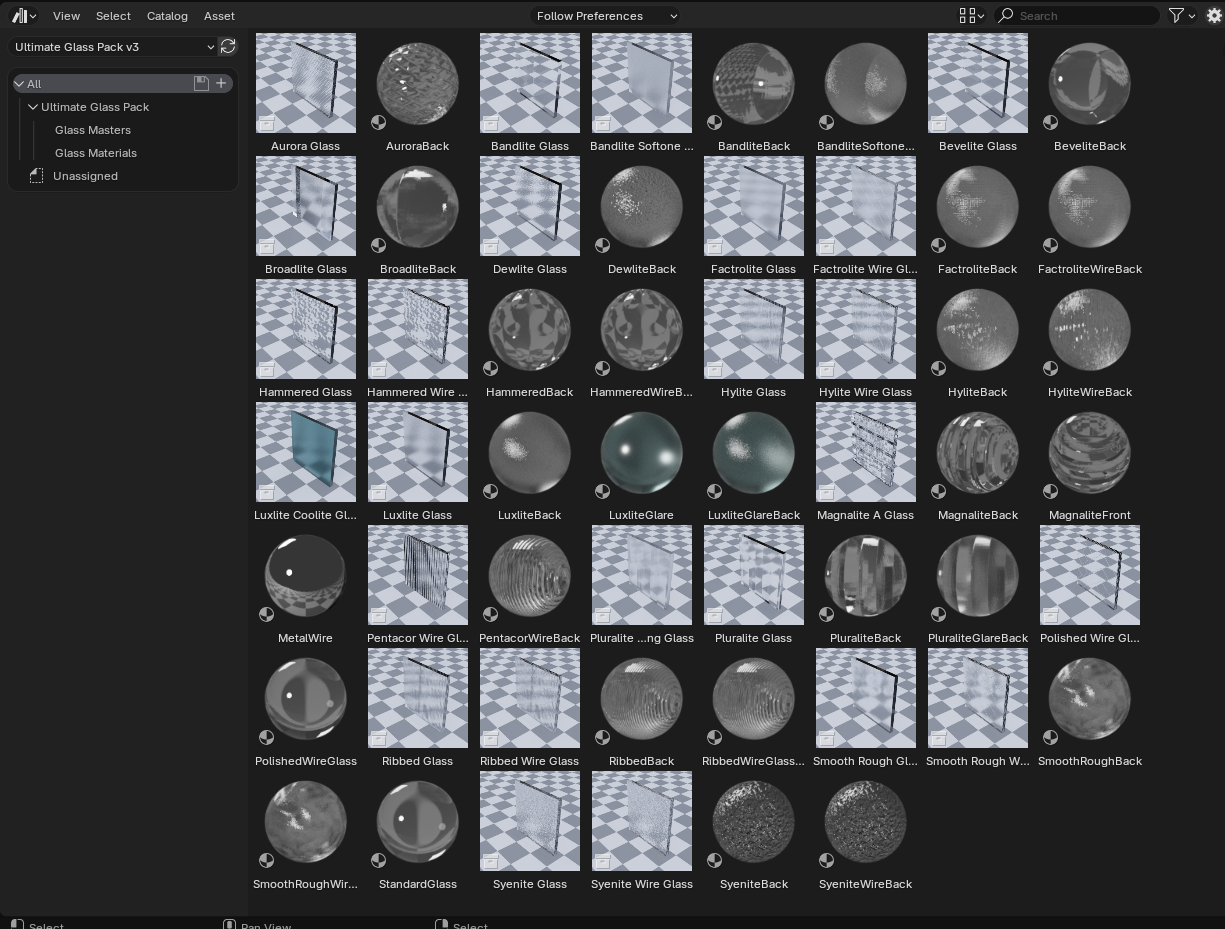
That’s it! You can now drag and drop the materials onto material slots in your project. I don’t recommend using the Glass Masters however you can and simply use an array modifier on them rather than the auto scaler that works with
the Append method. You will see a lot of the materials tagged with ‘Back’ in their name. These materials are meant to be used on one single side of the glass rather than the entire object as this gives the best and most accurate
results. If your glass is a single face, such as a plane you can use it however.
Append Method
This is the recommended method for using UGP as appending keeps the drivers and constraints intact whereas the Asset Browser does not. This method is straightforward. You simply use Blender’s append function to import the collection
of glass you want to use. I recommend using the Sample Preview images as a way to find the type of glass you would like to use.
After Appending the glass you want you will notice 2 parts to it (3 if it is a sample with wire). The master empty controls the global scale of the glass sample. This helps maintain the width and pattern scale of the glass sample as well as the scale of the wire mesh inside if it has one. Use the Master empty to scale and move the glass into your seen. After you have done so, you then select the glass sample itself, the cube, and adjust its scaling to fit into your window or location. The scale of the sample itself will repeat the texture of the glass automatically with its scale as well as scale the array modifier of the wire mesh inside if it includes one.
Important note, the wire mesh uses an array modifier so it will only scale with whole numbers (integers). See the below gif for as to how to work with this.
That’s it! You should have the glass sample in your seen and working! If you need any further help. Feel free to reach out at [email protected]